Neutral Density Filters

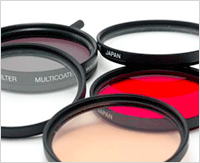
Sometimes when you’re shooting in broad daylight you may have a reason to use a longer exposure than you can achieve from your smallest aperture and lowest ISO setting. That’s where neutral density (or ND) filters come in.
ND filters have been widely written about, so I don’t intend to flog a dead horse here. Still, while shopping for ND filters today, I realized that this whole numerical rating system they use is kind of confusing, and I always wondered why some manufacturers will say ND.3, while others simply write 0.3, and yet others come out and plainly state “one stop.”
I personally prefer that everything be expressed in stops, but since that isn’t often the case, here’s my explanation… After the jump.
Neutral What?
A neutral density filter is supposed to decrease the “transmittance” of light into the camera. The reason it’s called “neutral” is because it’s not supposed to mess with the color of the light, only its brightness. Although transmittance technically refers to the intensity of light that is able to go through the filter itself, it affects the exposure of your photograph in the same way that aperture, ISO, and shutter speed do.
If each stop on the aperture scale (ascending) admits one half the amount of light as the previous (f/4 lets in half the amount of light as f/2.8, which lets in half the amount of light as f/2, etc.), you could say that its transmittance is changing by that amount.
Mathematics
Unfortunately, ND filters aren’t measured in transmittance, they’re measured in opacitance, which is sort of the opposite. Opacitance is calculated by finding the reciprocal of the transmittance. So if the transmittance is 2 (just for example), then the opacitance is 1/2. “Recriprocal” just means flip the fraction upside down, and whole numbers are fractions with a 1 on the bottom… Right?
I know this seems kind of academic and pointless, but bear with me, I’m almost done.
The ND rating of 0.3 or 0.6 is the base 10 log of the opacitance of the filter. Phew. What this means, though, is that those decimal values really do have very concrete f-stop equivalents. More examples!
A filter that compensates your exposure by one stop will admit half as much light as a clear filter (or no filter at all). Thus, the transmittance of the filter is 1/2. The opacitance is the recriprocal of 1/2, or 2. Get out your calculator and hit log 2 and you’ll get about 0.3 (actually 0.301…). Therefore, an ND filter rated at a density of 0.3 will have the same effect as stopping down by one f-stop (or decreasing your ISO by one stop, e.g. from 200 to 100).
So I guess I should just give you the chart, now…
|Optical Density|f-Stop Reduction|% Transmittance| |0.3|1|50%| |0.6|2|25%| |0.9|3|12.5%| |1.8|6|1.5625%| |3.0|10|<0.1%| |4.0|13|A very small number.| |6.0|20|A really, really small number.|
Putting It to Use
So what good is an ND filter that drops your exposure level by 10 stops? Probably the most common use is to get long exposure effects in scenes where there is a ton of light. Even at f/22 and ISO 50, you’re going to have a hard time making one of those characteristically veiled waterfall photographs if the sun is out. I don’t even know if 10 stops is enough to do that, it depends on the situation, but an ND filter can definitely give you an advantage.
In the same way that a very dark ND filter could allow you to use a super-long shutter time, it could also allow you to use a super-wide aperture in a situation where there is a lot of light.
Imagine getting very shallow depth-of-field images in broad daylight when even 1/4000th of a second is too slow. As I said, the first example is by far the more common one, but there are plenty of applications for a nice, dark ND filter.
Your kit shouldn’t be without one!
Speaking of keeping track of your kit, a nice tool for that is our Ultimate Travel Photography Checklist. Never forget an essential piece of gear again!
The Best ND Filters

When it comes to ND filters, some of the best are made by B+W. Sure, you can get ND filters from Formatt or Tiffen, but if you want the best fit and optical quality, you want B+W. The broad selection of filters available from B+W is another big distinguishing factor; if you shoot mostly Canon L glass as I do, you’re looking at a 77mm diameter threaded filter, and for ND filters specifically B+W offers 15, the other guys only make three or four at that size.
If you want to round out your kit with some ND filters, check out these B+W ND filters on B&H. These are the filters that I would recommend starting out with, and if you use these links to buy them I’ll get a small dividend from B&H (it does not change your cost in any way), which helps me keep this site up and running.
- Great for increasing motion blur on daylight subjects (like people walking) and casually usable (you can focus through the filter without much challenge), but with your lens at f/22, this filter brings you to f/64.
- Ten stops is enough to completely change the way you make exposures. Imagine putting this on a lens at f/22; ten stops above f/22 is f/724! Bear in mind that 10 stops does not mean f/10, it means 10 stops less light than full-open, which is about f/32. With this filter on, it might be hard to see through the lens to compose and focus; you may need to use a tripod, compose, and then put the filter on.
B+W filters are not exactly inexpensive, but know that when you buy a B+W filter, you are buying the best ND filter out there. Be aware that if you use a Canon or Nikon branded clear UV filter normally, which has a front thread for another filter to stack on top of it, you may want to remove it before putting on an additional filter from a different manufacturer. I have had B+W filters bind up on top of my Canon UV filters because the threading is ever so slightly different. Just a word of warning, YMMV(Your Mileage May Vary).
 Single-Serving Photo

Comments