The High Plains and Beyond
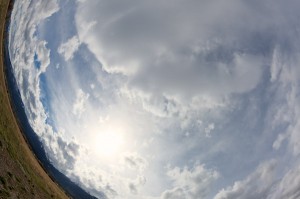
This week, I am traveling through the western US on a sort of national park whirlwind tour. I flew into Denver, CO on Sunday, took a quick jaunt through about half of Rocky Mountain National Park, and now I’m hanging out in Grand Teton National Park until tomorrow when I’ll head up to Yellowstone (to the right is a fisheye shot of part of the Teton range I took yesterday).
Although the landscapes are breathtakingly (and effortlessly) beautiful, photographing out here in these western mountain parks presents its own challenges, and I’d like to share with you what I’ve learned so far about successfully shooting in Rocky Mountain and Grand Teton.
The major challenges that face a photographer in the Colorado/Wyoming parks are:
-
Getting there,
-
Getting around,
-
The weather, and
-
Chasing the light
These hurdles all have straightforward solutions, except for chasing the light. Fortunately, that’s sort of the fun part, so it’s the challenge you signed up for in the first place if you’re out in the parks with your camera. If it isn’t, well, it’s not too late to sell all your stuff on Craigslist and find another hobby. I hear that flying sport kites is pretty thrilling…
Getting There
Getting to Rocky Mountain National Park is actually the easiest. You can fly right into Denver International (DEN), rent a car, and be in the park within a couple of hours. There is a town nestled right inside the park (like a little non-NPS island) called Estes Park, which offers many hotel choices.
I wasn’t staying over in Rocky Mountain NP, though, so I got back on the highway and drove toward Grand Teton, stopping in Rawlins, Wyoming for a night on the way.
The drive from Denver, CO to Jackson, WY—the border town you’re most likely to be in or around if you’re visiting Grand Teton NP—is a rather formidable eight or nine hours, most of which is spent on state highways coursing through seemingly endless farmland. It’s beautiful for the first three or four hours, and then it gets hypnotic.
To save some driving, you can fly into Salt Lake City, Utah, which shortens your voyage to a mere five hours. What I found, though, is that flights from the east coast out to Salt Lake City are significantly more expensive than those to Denver. Part of this is due to my preference for United Airlines, for which Denver is a fairly significant hub.
Either way, you’re going to be in the car for a while.
Before I get a bunch of angry or confused comments from my audience regarding the omission of Jackson Hole Airport as an option, let me explain the situation. Jackson Hole Airport is actually inside the national park, and is a stone’s throw from downtown Jackson. The problem is, it’s a tiny, single-runway airport that can only land small jets. Not only is it extremely expensive to get out there, you are at the whim of any inclement weather, and there may or may not be room within the cabin for both you and your camera bag.
I don’t know about the rest of you guys, but I don’t check my camera bag; it stays with me at all times. So yes, five to eight hours is a pretty onerous drive, but it’s actually a lot less expensive and dangerous for your equipment to just bite the bullet and do it.
On the upside, it’s amazingly beautiful all along the way and you never know when you’re going to run into photographic opportunities.
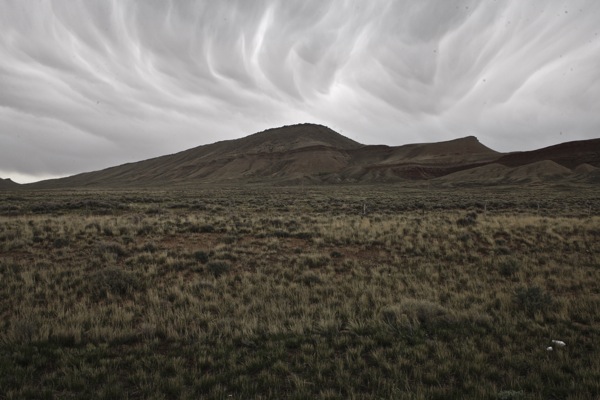
Here’s one I snapped from the side of the road somewhere along the highway in Wyoming (barely edited; I know it’s covered with lens spots and whatnot):
 {:.center.frame}
The geography and topography apparently result in a totally routine formation of incredible cloudscapes. It almost makes sitting in a car all day worthwhile!
Getting Around
The second hurdle that an adventurous photographer faces when shooting in these parks is that they’re enormous. I’ve photographed both Yosemite and Death Valley twice. Both are absolutely huge parks, but all of the parts you really want to see and shoot are pretty close together. Yosemite is a great example because the Yosemite Valley “loop” takes you by 99% of the sights you want to see, and by comparison to the park as a whole, it’s like a single raindrop in the ocean.
The various sights in Grand Teton NP are spread out across two long roads, highway 191 (also 26 and 89; lots of highways overlap for long distances in Wyoming, I haven’t figured that out yet) and Teton Park Road.
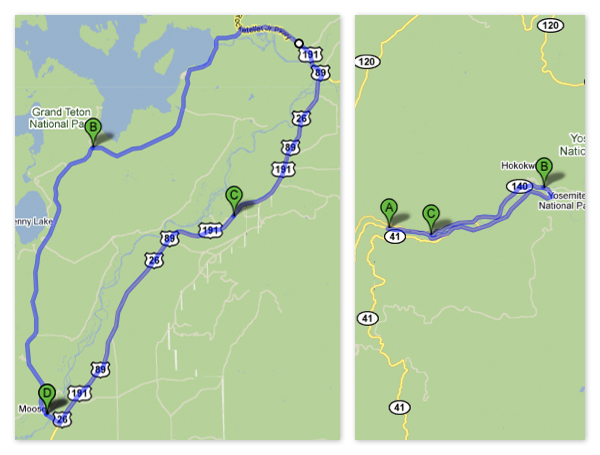
Let me give you some perspective. Not counting the drive into the park, which will vary depending on where you choose to stay, the drive all the way around the Yosemite valley “loop” (out on Northside Dr. and back on Southside Dr.) is 14.1 miles. Meanwhile, the entire loop of the Grand Teton NP—taking Teton Park Road north from the park entrance at Moose Junction and returning on highway 191—is 42.6 miles.
Check out these neat maps if you don’t believe me.
 {:.center.frame}
The loops are actually to scale, at least to the degree that Google Maps is. As you can plainly see, the Grand Teton National Park is not a park you can very easily drive around and around all day (whereas in Yosemite, that’s all I did… Around and around…)
This has an impact on your flexibility in choosing locations to shoot. Let’s say you want to photograph sunset and you aren’t exactly sure exactly where a good spot might be. At least in Yosemite you can drive by all of the candidates in 30 minutes. In Grand Teton, good luck… More about this in the last section.
The Weather
Every photographer is subject to Mother Nature’s whimsy. Sometimes weather plays directly into the photographer’s hands and they wind up with something like Clearing Winter Storm, but more often than not, the weather is an impediment.
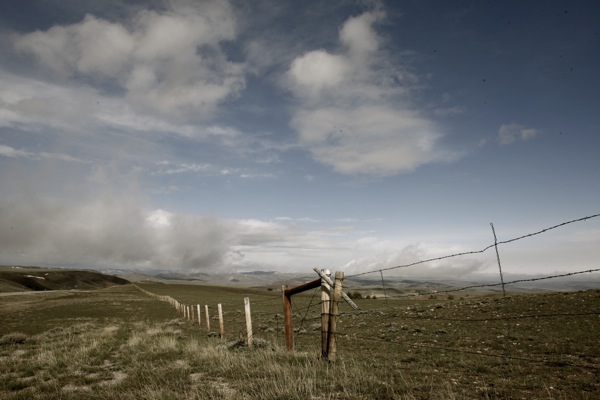
From what I’ve experienced so far here in the Grand Tetons, the weather changes by the minute. You’re driving along and you see these nice blue skies and everything looks happy…
 {:.center.frame}
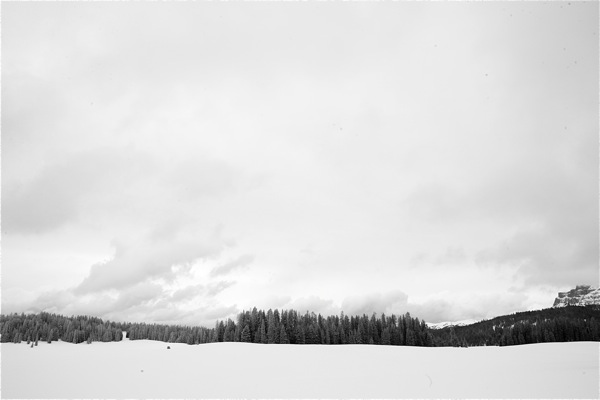
And then you go into the park and the next thing you know you’re at 6,000 feet elevation and the world is a winter wonderland!
 {:.center.frame}
The two photos above were taken only four hours apart. Even for a very high value of how fast do you think I was driving? it’s incredible to move from one weather system to another in the blink of an eye.
Up here in the foothills of the Tetons, it can rain and snow spontaneously, and I have seen storms roll in and roll out almost as fast as you can say what on earth is happening?
Needless to say, dress in layers, pack an umbrella, maybe some snow shoes, you get the idea. Sometimes the results can be spectacular, but you have to be ready to roll with it.
Chasing the Light
The most exciting—and at the same time, tedious—part of this whole national park, landscape, nature photography gig, is what my fellow workshop instructor Chris Blake calls chasing the light.
Even when you have a really solid idea of the kind of photos that you want to make in a park, there is never any guarantee that even the most “tried and true” natural vista will deliver for you on any given day. There are basically two approaches to this hurdle that I have employed in the past:
-
Commit to a location and stick it out; if the atmosphere doesn’t cooperate, try not to cry about it.
-
Identify the best candidates for a particular time of day and stay mobile. If it doesn’t look great in one place, move to another… Lather, rinse, repeat.
The latter course of action is what I term chasing the light, because that’s literally what you’re doing. If you really want a photo from Yosemite’s Tunnel View or Death Valley’s Zabriskie Point, absolutely go for it. My advice, though, is to keep your options open.
If sunset isn’t going to be anything special, well, it doesn’t much matter where you are, but don’t lock yourself into one spot when another could offer the chance of a lifetime.
I was once shooting Tunnel View at sunset, alongside what must have been 20 other very serious shooters, one of whom had a massive 8x10 bellows camera that took her fifteen minutes just to set up (talk about commitment to a location). As the sun began to set behind the mountains, it was apparent that not much was going to happen. The valley grew darker and darker, but there wasn’t much color to speak of.
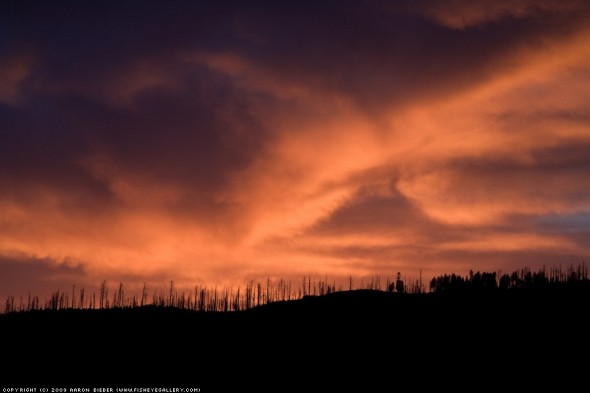
I got into my car and went up the hill, through the tunnel, to the other side of the peak that borders the Tunnel View parking lot area. As I emerged from the other end of the tunnel, I was greeted by a fierce red sky, glowing intensely behind a faraway mountain ridge covered with burned trees.
 {:.center.frame}
I could not have captured this image if I had stayed at Tunnel View with those 20 other very dedicated and serious pros. This is the best advice I can give to any nature landscape photographer: stay mobile, and don’t be a slave to famous overlooks.
Happy shooting, my friends.
 Single-Serving Photo
Comments